Sparkles and glitter are two of my favorite things. Therefore, my first tutorial of sorts being a shaker card is fitting! I remember the first time I saw a shaker card, I just HAD to make one! I've made many of them now, and I thought it would be fun to share my process and welcome input on how everybody else does this, too!
So, first things first, to make a card like the cute Polar Bear card I'm sharing here, you will need:
-Stamped images, colored with your preferred medium (I used Spectrum Noir markers)
-Middleground paper (I used an alcohol ink background I mixed up using Ranger's alcohol inks in ********)
-circle dies, in two separate, consecutive sizes (nesting dies that stack next to each other are best, and you can get creative and use squares, rectangles, ovals, and irregular shapes!)
-acetate or packaging material from your extremely important and necessary supply purchases. I used the wrapper from a pack of stickers here.
-3M Scotch Brand foam mounting tape (or any foam tape you may have)
-double sided tape
-paper for background (not necessary if you want more contrast on a white card base instead, I just wanted lots of glitter for mine!)
-A variety of sequins, glitter, seed beads, microbeads, etc- any combo you think is fun and will tie in the colors of the rest of the card.
To get started:
First, cut the midground paper down to 1/2" smaller than the card base you will be using. This gives you a nice 1/4" margin on the finished card to use the background paper as a border as well as the background for the scene inside the window. The card I did today is a 5 1/2" x 5 1/2" card base.
Using the smaller die of the two you selected to be the "window," find the placement you want for the window and cut it out from the selected midground paper you selected. At this point, I usually die cut my acetate/transparent packaging from the larger of the two dies so that I don't need my die cutting machine out any more. It's really important to make sure you cut a transparent piece for the window BIGGER than the original window you cut- you have to be able to stick it to the back side of the window. To do this, I use double sided tape to line the edge of the window on the back of the paper, then stick the transparent part right on top of it.
Next, we want to add our dimension to the card using the foam tape. I folded the 3M tape over on itself, once, in order to add more dimension so there was lots of room for my sparkles to move around.
When it comes to the window, outlining the circle can be a challenge. I usually cut thin strips of the tape, then slash it every 1/4" or 1/8" (just eyeball it). You don't want to cut little chunks off- just cut it halfway so that it can bend and be more rounded.
Leaving the intact or uncut portion of these strips to the side closest to the window allows you to bend it perfectly around the circle. Make sure you get good coverage with the foam all over the back so that it doesn't get squished in the mail!
Next, we want to position the raised layer over the background we cut out to get an idea of where the sparkles will be. This step isn't necessary, but I think it really makes a big difference- some of the sparkles will always be "stuck" so that the background of the window isn't so plain, even when held and viewed vertically or standing up.

I placed some where I liked inside the window, then glued them down using my Ranger Matte Collage medium. This is my go-to glue because you can't see it when it's dry
The fun part is next: pile on your sparkles! I mixed sequins, extra large hexagon glitter, and little star-shaped glitters together for this one. I do this so that I can check how much there is before I permanently glue the window on- sometimes, if you put a sentiment or stamp scene in the window, this makes it easier to ensure the little pile of sparkles doesn't obscure the sentiment or stamped images.
It's time! Peel the backing off the foam tape, line up the top layer nice and square, and stick it down!
Add dies, stamps, sentiments, and embellishments as you see fit, and you have made yourself a shaker card!
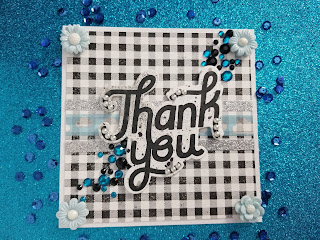
Here are a few more shakers I've made:
This was made with my Concord and 9th Fall Turnabout Stamp and Leaf die.
This was made with Ranger Distress inks for the rainbow background and the cute little unicorn is from Craftin' Desert Divas.
Another little cutie from Craftin' Desert Divas, and the fun frame is their die cut, as well!
This one has a cute little mermaid from The Greeting Farm along with a die from Sizzix for the window.
This Lawn Fawn Jungle Critters stamp set made a gorgeous shaker!
Two more of the Little Mermaids from The Greeting Farm.
When I first saw this adorable fairy set from Lawn Fawn, I knew I was going to make lots of shakers with them! Pink and purple are my favorite, and I loved how this one came out!
I'd love to see how yours come out- I hope this little tutorial is helpful! Share what you make in the comments below! Hope everyone has a great day, and don't forget to follow me for more fun crafty projects!


Comments
Post a Comment